How-To Setup Enjoyment work
Table of Contents:
This is going to be a super simple post about how to setup and use this theme for your own website.
Usage
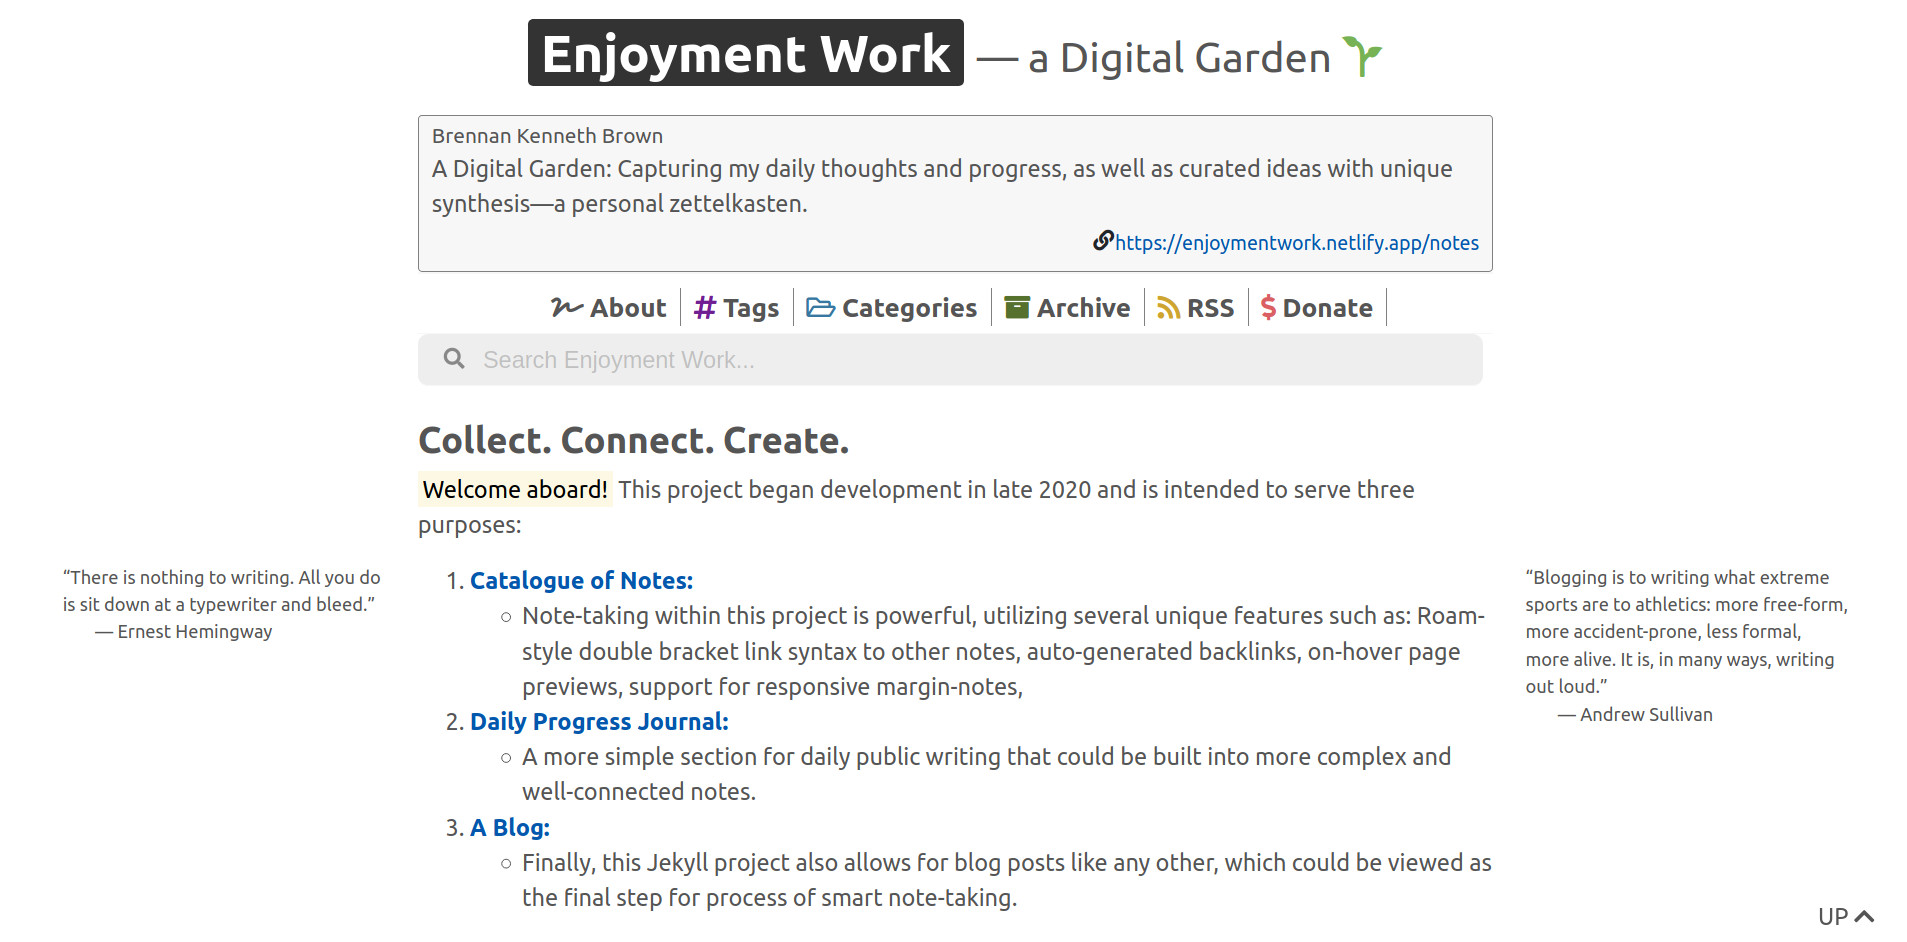
Q. What will it look like when I am done setting it up?
This is what it should look (minus the exact essays ofcourse):
Now without further ado, let's get started!
Setup Prerequisites
For this tutorial, we’ll need to install a few things on your machine (you may have some of these already). Following the instructions on each website to install them.
You’ll also need to create accounts on the following services:
Once you are all set with the prerequisites, we can then get to the fun part of getting it to appear on your screen. Let's get started with that.
1. Create a fork of the template repository
To simplify things, I provide the template showed in the image above to get started. You can always tweak this template to your taste later.
Visit the GitHub page for my template repository (raghuveerdotnet/jekyll-seamless), and fork it to your account using the Fork button:

Once the forking process is complete, you should have a fork (essentially a copy) of my template in your own GitHub account. On the GitHub page for your repository, click on the green “Clone or download” button, and copy the URL: we’ll need it for the next step.
2. Clone your repository locally
Next, we want to download the files from your GitHub repository onto your local machine. To do this, replace
$ git clone <YOUR_COPIED_URL_HERE> my-personal-website
As a reference point, this is how it looks like for me (the difference is likely just the GitHub username):
$ git clone [email protected]:raghuveerdotnet/jekyll-seamless.git my-personal-website
Then, navigate into the directory that was just created:
$ cd my-personal-website
3. Test out the site locally
Sweet! You now have your repository’s source code on your machine. Within the my-personal-website directory, run the following command to install the necessary dependencies like Jekyll:
$ bundle
Once that’s done, ask Jekyll to start serving the site locally:
$ bundle exec jekyll serve
Then, open up https://localhost:4000 in your browser.
If everything’s done correctly, you should now see the home page of your Personal Jekyll Website with Enjoyment work Theme. 🎉
Keep in mind that this site is only available locally (notice the localhost part of the URL), so if we want it to be available on the Internet for everyone to enjoy, we need to deploy it to the Internet: we’ll use Netlify for that in the next step.
4. Connect your GitHub repository to Netlify
Netlify lets you automatically deploy your personal website on to the Internet when you update your GitHub repository. To do this, we need to connect your GitHub repository to Netlify:
- Log in to Netlify
- Once logged in, click the “New site from Git” button
- On the next page, select GitHub as the continuous deployment provider (you may need to authorize the connection, in which case, approve it)
- On the next page, select your website repository from the list.
- On the next page, replace the basic build settings with the following.
- Type in "jekyll build" (without the quotes) inside the text field titled "Build Command".
- Similarly type in "_site/" (without the quotes) inside the text field titled "Publish Directory".
- On the next page, keep the default settings, and click on “Deploy site”.
That was easy! We’re almost done.
Wait a couple of minutes for the initial deploy to complete.
Once that’s done, your website should be available on the Internet via a generic Netlify URL, which you can change to a custom domain later if you’d like.
Now the cool thing is this: whenever you push an update to your GitHub repository, Netlify will automatically deploy your updates to the Internet.
5. Start producing content with your Enjoyment work based Website
At this point, you can start updating the files on your machine (in the my-personal-website folder) to change your jekyll seamless based website to your liking: update the copy, add some notes, tweak the layout, customize the colors, etc. Once you have something you’re happy with, push your changes to your GitHub repository with the following commands:
$ git add --all
$ git commit -m 'Update content'
$ git push origin master
If that command succeeds and the rest of the tutorial was done correctly, in a couple of minutes, you should see your changes live on your Netlify website. 🚀
And we’re done! You now have your own Enjoyment work based Personal Website .
If you’re curious, take a look at my personal jekyll seamless based website here.
This setup tutorial is inspired by Maxime Vaillancourt's Digital Garden Tutorial.
About Francisco S.
Cloud Engineer and SRE by day, visual artist by night.